Installing Clinical / Pracsoft with the Installation Wizard
Before you begin
- If you have your own full SQL and want to use it rather than the supplied 2014 SP3 Express Edition, please refer to Configuring a Full SQL Server information. You must configure SQL according to these settings before you can proceed with the installation of Clinical and/or Pracsoft.
- Please ensure you have read the Installing MedicalDirector Clinical/Pracsoft for the First Time section before continuing.
- Please ensure you have followed the New Installation Checklist above before continuing.
- If an error message is displayed during installation, contact MedicalDirector Customer Service for assistance. It is recommended that you do not attempt to resolve any issues without assistance from MedicalDirector Customer Service.
- Install the software on the Server computer first, then install the software on the workstation computers where you want to run Clinical and/or Pracsoft.
- If you have existing Pracsoft 1.x or 2.x data and you want to upgrade to 3.x, please contact MedicalDirector Customer Service for assistance before you install the software.
Procedure
-
Mount the installation ISO. Alternatively, you can burn a DVD of the ISO. The MedicalDirector
Installer application should start immediately. If it does not start, browse to and
double-click Setup.exe. The Installation Wizard appears.
- Mount the ISO. To do this, use archiving software such as 7-Zip to extract the
contents of the ISO into a folder on your computer. Right-click the ISO file,
then clickExtract to. Select a location (a new, empty
folder is recommended), and then run Setup.exe from within this folder.
For Terminal Server Users:
- If the MedicalDirector Installer window is open, click Cancelto close it.
- When installing on a terminal server, the software cannot be installed directly from the DVD, or it might not be available to all users.
- Remove any active or disconnected sessions listed within the Session Manager before beginning the installation.
- Advise all users not to log in to the Terminal Server until the installation is complete. We recommend temporarily blocking all user access. If any users log in during installation, the installation process might fail or they might not be able to use the software successfully.
- The server must be in Install Mode during installation. To do this,
launch the MedicalDirector Installer through Add / Remove
Programs by clicking Add New
Programs button, then browse to and double-click
Setup.exe. During this procedure a window
should open instructing that it not be closed until the install has been
completed.
Refer to your Operating System help or Microsoft for more information on installing software onto a terminal server.
- Mount the ISO. To do this, use archiving software such as 7-Zip to extract the
contents of the ISO into a folder on your computer. Right-click the ISO file,
then clickExtract to. Select a location (a new, empty
folder is recommended), and then run Setup.exe from within this folder.
-
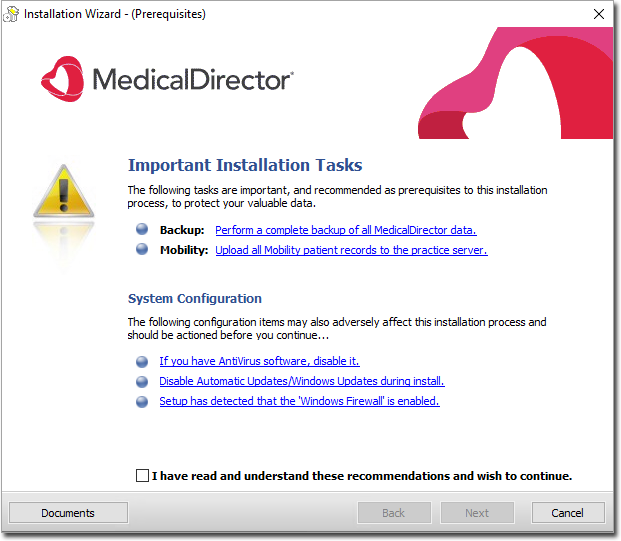
Click Next. You will be presented with a list of important
installation tasks. Click each link, read the information and perform the tasks as
necessary.
-
After you complete the necessary tasks, tick .
Note:Issues with the following must be resolved before you start the installation. If the issues are not resolved, the installation might fail:
- Antivirus software
- Some virus scanners prevent installations because they mistake legitimate activities in software installation for the harmful activity of a virus. We recommend temporarily disabling any antivirus software during the installation. Re-enable the antivirus software when the installation is complete.
- Firewalls
- Firewalls are known to be a major source of installation issues, for example, by blocking the discovery of databases that need to be upgraded. We recommend temporarily disabling any firewalls during the installation. Re-enable the firewall when the installation is complete.
- Windows Opportunistic Locking
- Opportunistic Locking affects the performance of MedicalDirector Clinical. We recommend disabling it. If you disable Opportunistic Locking at this time, the computer will be restarted, then the Installation Wizard will continue.
- The Licence Agreement is displayed. Read it and, if you agree to the terms, tick the associated check box, then click Next.
-
The Installation Wizard checks whether your system requires any additional
third-party software to be installed. If so, it displays a message similar to
this:
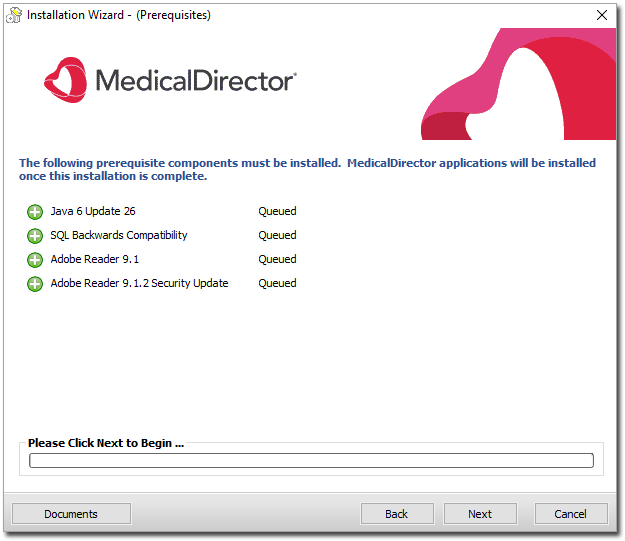
If additional third-party software is needed, click Next. The listed software is installed. This can take some time, depending on the number of applications to be installed and their requirements. You might need to restart your computer, then the Clinical / Pracsoft Installation Wizard will continue.
For Terminal Server Users:- If the computer has restarted and the MedicalDirector Installer has restarted, click Cancel to close the MedicalDirector Installer. Launch the MedicalDirector Installer through Add / Remove Programs again, to ensure the terminal server is returned to install mode before continuing.
A message is displayed that that states whether the required third-party software was installed successfully. If any were unsuccessful, please consult your Systems Support for assistance.
- Click Next.
-
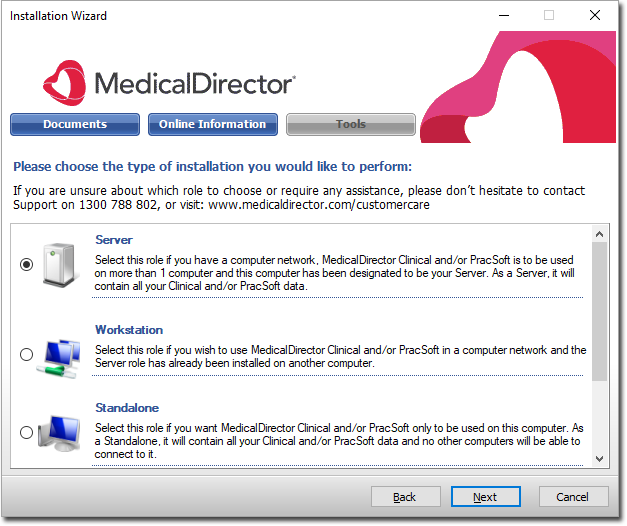
Select the type of installation you would like to perform, based on the role the
computer will have in your practice.
 The roles are:
- Server
- A computer that will act as your MedicalDirector Server, where your patient database is stored. The MedicalDirector applications will also be installed. ManageEzy (used for document and letter storage) will be installed in a shared folder and referenced by a network path, allowing workstation computers to access the folder remotely. This option requires an active network connection.
- Workstation
- A fixed computer on which you will run the MedicalDirector applications but not store the patient database. Workstation computers access the patient data from a database stored on the Server computer. This option requires an active network connection.
- Standalone
-
A computer that will act as your MedicalDirector Server, where your patient database is stored. The MedicalDirector applications will also be installed. ManageEzy (used for document and letter storage) will be not be shared, and will be referenced by a local path (C:\...).
- Mobile
- A mobile workstation computer, for example, a laptop, for example, on which you will run the MedicalDirector applications. When connected to your practice network, this computer will act like a workstation and access the patient database on the Server. So that the it can be used outside the practice, a second SQL database will be installed on the Mobile computer, with an instance name different from the Server's. This second database will store downloaded patient data for use whilst disconnected from your network. On reconnecting to the network, the patient data must be transferred (uploaded) to the Server's database. This option requires an active network connection.
- Select the role you want this computer to take. Click Next.
-
Select an instance of SQL on which to install the patient database. The following
screen varies slightly, depending on the type of installation you have selected. If
you intend to use full SQL, it must be installed and configured
correctly before proceeding with this step.
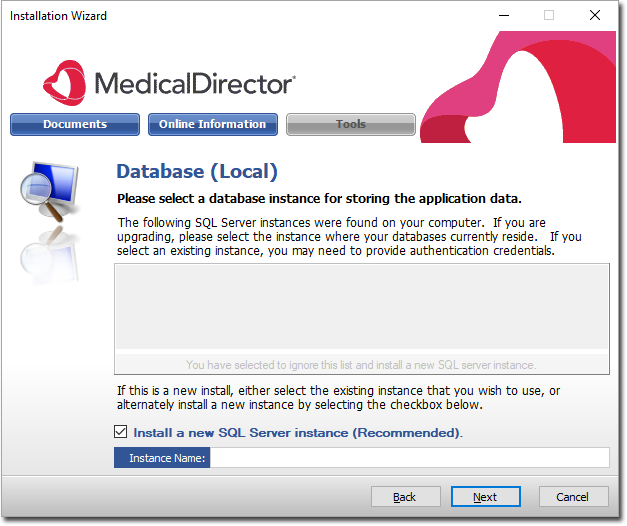
- If you selected Server or Standalone, you can choose to either install a new MedicalDirector Server (as indicated in the image above), or use one of the SQL Servers you already have installed. If you installed FULL SQL, then HCNSQL07 and ESP will be listed and HCNSQL07 will be selected.
- If you selected Workstation or Mobile, it is assumed you will be connecting to an existing SQL instance on your Server computer.
- Click Next.
-
Select the applications you want to install.
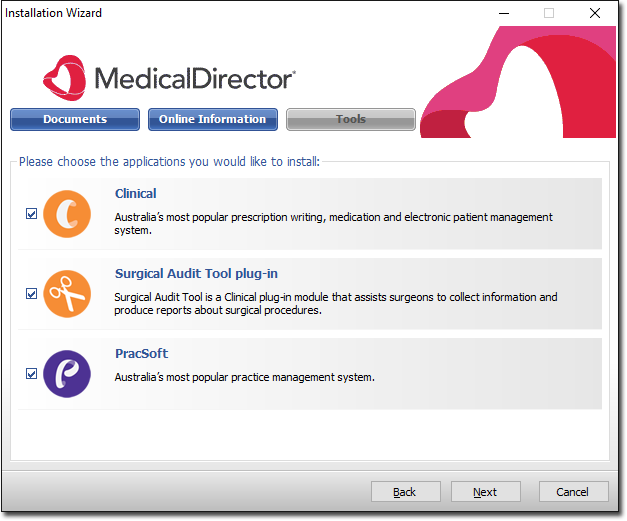
The Surgical Audit Tool is a component of Clinical, and is only available with an installation of Clinical. If you choose not to install the Surgical Audit Tool now, you can install it later. - Click Next.
- Review the installation summary.
-
(Optional) Two different locations will be used for the installation of:
- The SQL Server Data Files
- The document storage location
- The MedicalDirector Application Suite (Clinical and/or Pracsoft).
If you need to change the default installation locations, click Advanced Options (available only for Server/Standalone Installations). These components,must all be installed on the local computer, not on other network locations.
Important Note: If you install the document storage location to a drive other than your primary/system drive, the drive must have a Volume Label.
- Click Begin when you are ready to procede. So you can monitor the progress of the installation, secondary installation windows are displayed as individual components are installed. No action is required.
- When the installation is complete, click Finish.
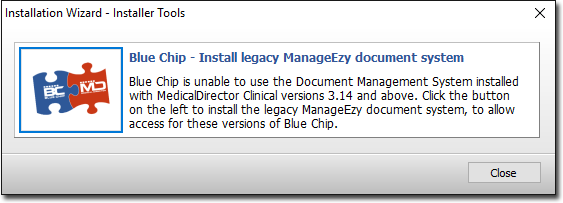
- (Optional) If you also intend to install Bluechip with MedicalDirector Clinical, you will need to install the legacy ManageEzy Document Management System. This comes supplied with the Installation Wizard, and is accessed via Tools
-
If the ManageEzy Document Management System is not installed, this message is
displayed. Click Closeto install ManageEzy.
- After ManageEzy has been installed, you can commence installing Bluechip.