Create an eSignature
Create an eSignature with which to electronically sign documents.
Before you begin
Procedure
- Open the MedicalDirector Care widget from the Smartbar and select User Settings.
-
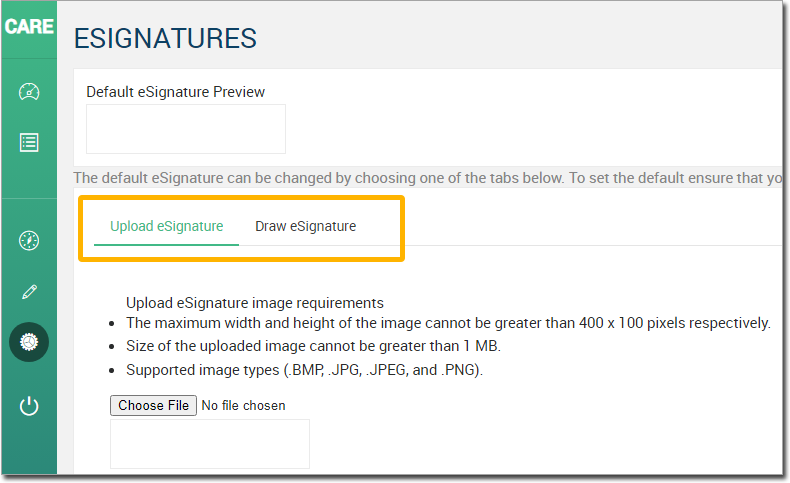
Locate and click the eSignatures settings button, as shown below.
If this is the first time you have created an eSignature, the Default eSignature Preview window will be blank, as shown in the example.

-
Select either the Upload eSignature tab or the
Draw eSignature tab to enter a new eSignature.
- The Upload eSignature tab allows you to upload an image of a signature that you already have saved on your computer.
- The Draw eSignature tab allows you to create a new
eSignature, manually, by using your finger or stylus on a touch-screen or tablet.
-
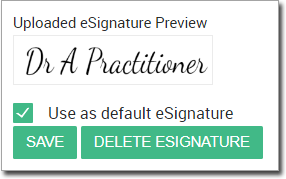
You will be presented with a preview of the eSignature, and prompted to use it as the default. Tick the Use as Default eSignature checkbox to confirm.
-
The eSignatures settings window will now display your default selected eSignature. This will be used for all future Care Plans created in MedicalDirector Care, unless you choose to delete it and create a new one. No other configuration is required.
