Managing Recall Actions via the Patient's Record
Before you begin
Procedure
-
Select . The Recall Items window appears.
- The upper section of this window lists the patient's recalls.
- The lower section lists any recalls actions you have recorded against each of the recalls in the upper section i.e. each recall can have multiple actions recorded against it.
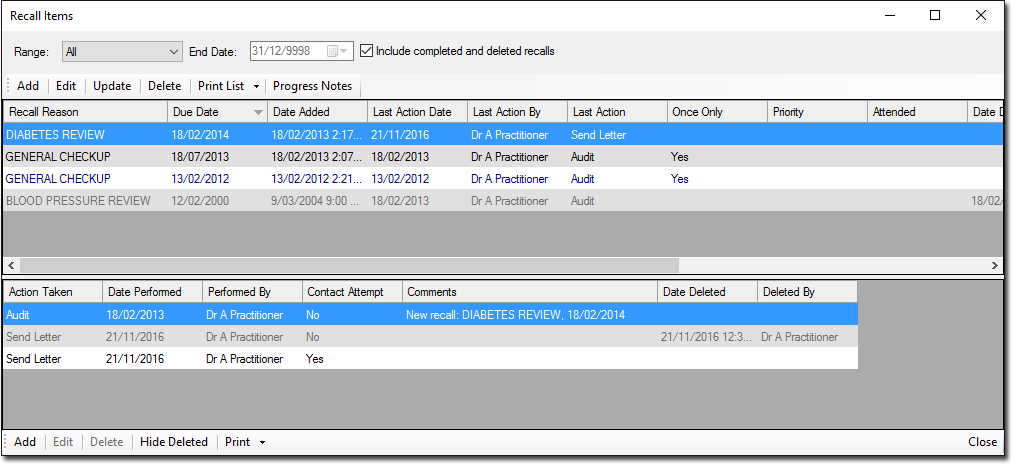
- Select one of the available recalls in the upper section to manage actions for.
- (optional) If the selected recall has had actions applied to it which were subsequently deleted, you can reveal these now by clicking the Show Deleted button. If this button is not available, it is because there a no deleted actions to reveal.
-
Then, to:
- Add a new action, click Add. Continue now to Step 5.
- Edit an existing action, select it from those available, and then clickEdit. The Edit Recall Actionwindow appears. Continue now to Step 6.
- Delete an existing action, select it from those available, and then clickDelete. You will be prompted to confirm this. Note that this cannot be reversed.
-
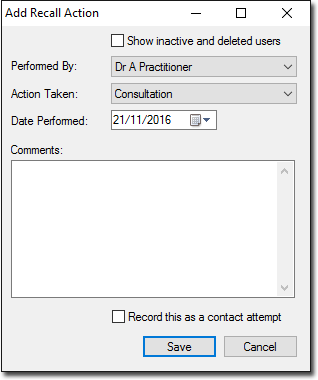
In the Add Recall Action window, indicate who performed the
Recall Action via the associated drop-down list. Optionally, you can include inactive
and deleted practitioners and users in this list.
-
Indicate the type of action performed. Select from:
- Consultation
- Other
- Send Email
- Send Fax
- Send Letter
- Send SMS
- Telephone Business
- Telephone Home
- Telephone Mobile
- Enter the date on which the Action was performed.
- (Optional) Record a comment if desired.
- (Optional) Indicate whether you also wish this action to be recorded as an attempt to contact the patient.
- Click Save to save the action to the patient's recall item.