Workflow 2 – Via the Patient's Clinical Window
Before you begin
This method is not available to users with 'Basic' access.
Procedure
-
Within the patient's Clinical Window, select either of the Correspondence, Results, Letters, or Documents tabs. You can import/scan from any of these tabs, and then move the resulting document between tabs if you wish. As the Correspondence tab displays a culmination of documents from other tabs, it will be used for the remainder of this example workflow.

Please see Correspondence Tab for detailed information about this window. -
Choose whether to import or scan a document by clicking the associated button in the upper tool bar;
- If you choose to import a document, you will be asked to browse to and select a document to import. Skip to Step. 6.
- If you choose to scan a document, the scanning utility will appear. Continue now to Step 3.
-
If you have chosen to perform a scan, your third-party scanning software will be called upon. It is with this software you perform the scan, after which you will be returned to Clinical and presented with the Scan Document window.
-
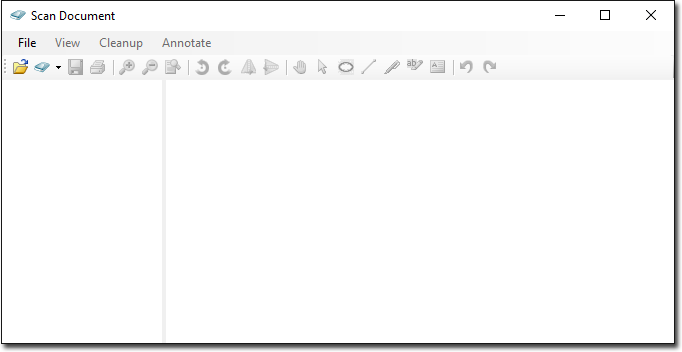
You will be able to see a preview of the scan you have conducted, along with all the other scans you have added to this document. Each thumbnail on the left-hand side of this window represents a page that you have either scanned or imported into this document. The example below shows that the current document consists of two scanned pages. From here you can delete pages, rearrange pages, and add annotations.

Please see Scanning Documents for more information about this window. -
Click the
 button to save the current document.
-
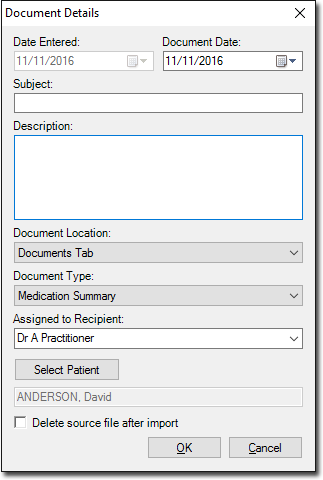
The Document Details window appears. Enter details as desired. The Subject and Document Type is required information. As you have scanned/imported this document within a specific patient's record, it is assumed that it belongs to this patient, and as such they will be selected by default, as shown in the following image. You can always associate it with another patient if you wish. It is advisable to assign this document to a recipient at this time also.
-
Click the OK button to confirm and save the information. You will be returned to the Clinical Record.
This concludes the steps for scanning/importing documents directly to the patient's record.