Configuring the Automatic Update Utility
Before you begin
This step involves telling your server computer:
- Whether or not you want it to check for MDref updates.
- How often you want the check to occur.
- When you want the download and (optional) installation to occur.
- Whether or not you want the update to install automatically.
Procedure
On your Server Computer:
-
Locate and right-click the MedicalDirector Automatic Update icon

in your Windows System Tray.If the MedicalDirector Automatic Update is not active, it is available via Start > All Programs > MedicalDirector > Automatic Update > Automatic Update.
- Select Preferences from the menu that appears. The Preferences window appears.
- Tick the Schedule check box (Check for updates every…), and indicate how often you want to automatically check for updates (Month, Week, Day, Hour).
- Choose when to download and install available MDref updates; as soon as they become available, or at a pre-determined time (and set the time if you select this option).
- The Applications to Update section lists the installed applications that can be updated. Indicate whether you want MedicalDirector Automatic Update to auto-check for updates to MDref and whether you want the update to auto-install, by ticking the associated checkbox(es).
-
Click Browse to locate and select a location on your Server
to save the downloaded file(s) to. Note that this cannot be a shared location (e.g.
\\My_Shared_Folder), or any network resource.
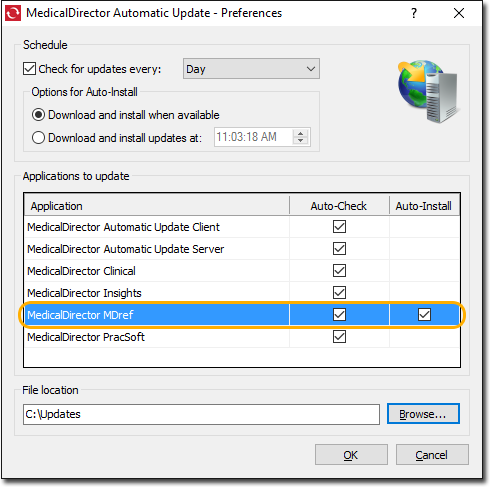
- Click OK to save your settings.
What to do next
To view a history of updates, right-click the MedicalDirector Automatic Update icon
and select History.
and select History.