Configuring Advanced Pathology Settings

Before you begin

Procedure

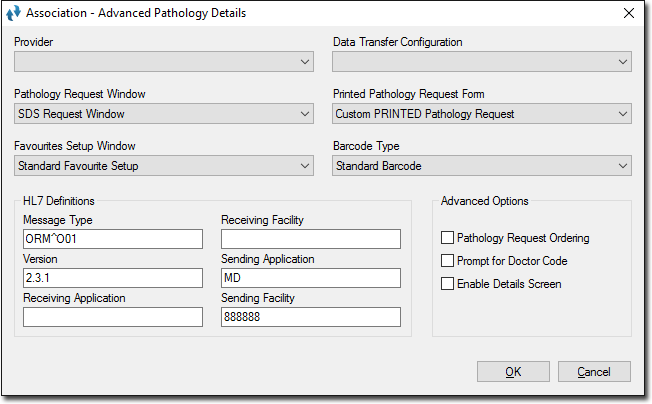
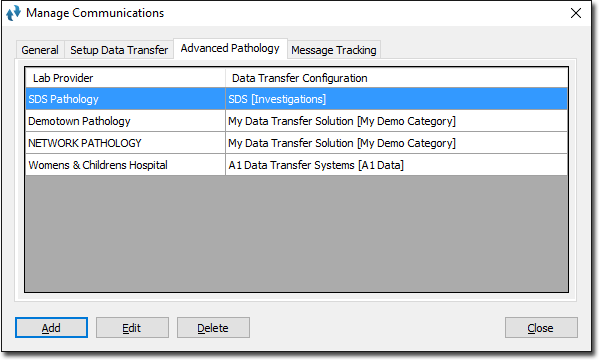
  1. Within the Manage Communications utility, select the Advanced Pathology tab.

  2. Click Add (or if you want to edit and existing configuration, select it and click Edit). The Association - Advanced Pathology Details window appears.

  3. Via the Provider drop-down list, select the Provider whose advanced pathology settings you want to configure. If the Provider you want is not listed, it may be that you have already configured their settings (in which case you cannot add them again), or they do not exist in your Clinical Address Book. See Address Book for further information about adding companies to the Address Book.
  4. Choose a Data Transfer Configuration via the associated drop-down list. If you need to create a new Data Transfer Configuration, you must do so first, via Manage Communications > Setup Data Transfer tab.
  5. Configure the remaining settings on this window as determined by your Pathology Service Provider.
    • For example, for SDS laboratories, select the SDS Request window - for Sonic laboratories, select 'Sonic'. The most common settings will appear by default. Please consult your Service Provider for advice.
    • Do not select the 'SDS (Legacy) Request Window' unless advised by your Pathology provider. as it is there only for use with the supplied Samples database.
  6. Click OK to confirm these settings.

Results