Setting Up Data Transfer Services
Before you begin
For each Investigation Results data transfer service you use, you can specify:
- The name of the service.
- The category of service (a 'standard' category is provided, and you can create customised categories).
- The location of the service's Import and Export folders.
- Whether a particular service will take advantage of the automatic importing of Results via Scheduled Document Import (SDI).
- Whether you can manually importing Results for a particular service.
- Whether an Acknowledgement ( ACK ) file will be generated for a particular service.
- Whether these settings are available to all computers (Global) or a particular computer.
Procedure
-
Within the Manage Communications utility, select the Setup Data Transfer tab.
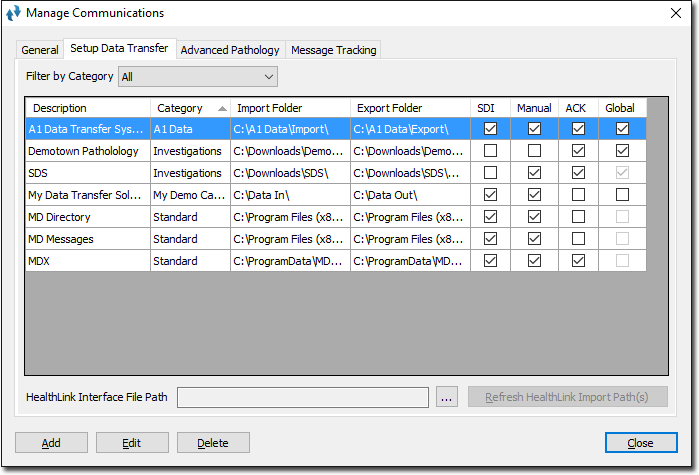
Note in the image above there are already three data transfer configurations (MD Directory, MD Messages and MDX). These are supplied with MedicalDirector Clinical. Their descriptions, category associations and import/export folder paths cannot be modified. Note also that the MDX path will only be present for sites running MD Exchange. -
Click Add. The Setup Data Transfer
Details window appears.
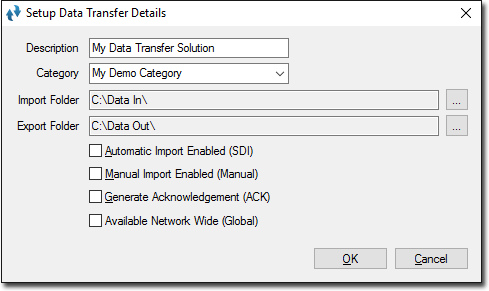
- Enter a description for the data transfer service in the text box provided.
- Select or create a category to assign this data transfer service to. If you want to create a new category, simply free-type its name into the Category drop-down list.
- Via the Import Folder section, indicate the location on your computer where new Investigation Results for this service will be stored. Your Service Provider may have created a folder for you.
- Via the Export Folder section, indicate the location on your computer where Acknowledgement ( ACK ) files are stored.
- Indicate whether Results for this service will be checked for and imported automatically, periodically via Clinical's Scheduled Document Import (SDI) service.
- Indicate whether you would also like the ability to import Results manually (by pressing F5 in Clinical).
- Indicate whether you would like to generate an Acknowledgement ( ACK ) file for this Service.
- Indicate whether this Service is available to all computers (Global) or only the specific computer you are currently working on.
-
Click OK to confirm these settings. You will be returned to the Setup Data Transfer tab, where your new Data Transfer Service can be seen, an example of which is shown below.
- Click Close to confirm any changes made to the Manage Communications utility. This will also close the Manage Communications utility.