SQL Installation Steps
Before you begin
Procedure
-
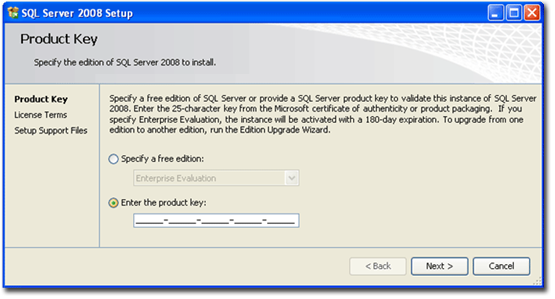
Product Key Screen
- If you are installing one of the Full variations of SQL Server (i.e. not the Express version) you will be prompted to enter a Product Key.
- Alternatively you can install as an evaluation version (subject to Microsoft's policy on evaluation versions, which can include a trial period), by selecting from the drop down box.
-
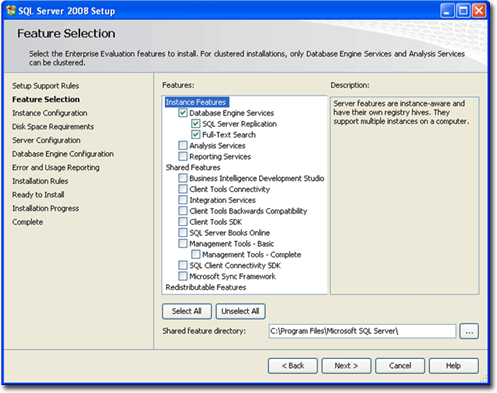
Feature Selection Screen
- Select the components of SQL Server which you want to install. Select a feature to read a brief description about it in the right-hand panel. Note: The Analysis Server and Reporting Services items can be de-selected, as they are not required for MedicalDirector software.
-
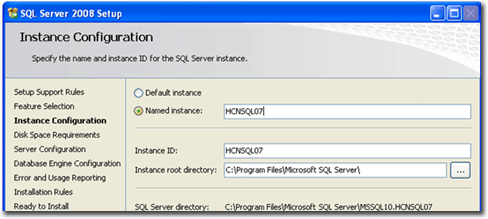
Instance Configuration Screen
- Specify a named instance. MedicalDirector software requires the following instance names be used:
- HCNSQL07
- ESP
- HCNMOB07 (for HCN Mobility role installs)
-
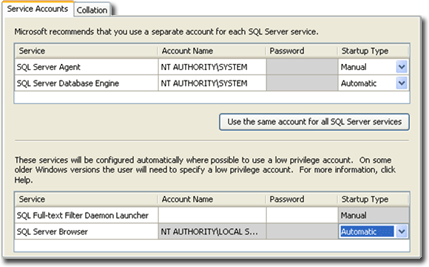
Service Accounts Tab
- SQL Server Browser entry has the Account Name of the built-in System Account – Local System
- Startup Type is set to Automatic.
-
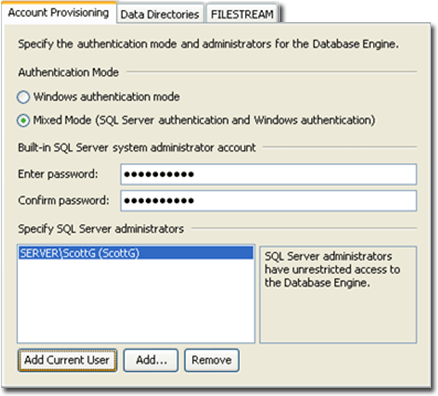
Database Engine Configuration Screen, Account Provision Tab
- Select Mixed Mode authentication.
- The SA Password must adhere to 'strong password' rules (e.g. HcnTemp123$).
- SQL Server Administrators, click the Add Current User button.
- Optional: Data Directories Tab, to specify a non-default installation directory. If required, you can select to install the Databases in a different folder other than the default location. If you are unsure, leave the folder locations with their default values.
- Select Mixed Mode authentication.