Formatting Tables
Before you begin
Procedure
- Select the cells you wish to format.
- (Optional)For text and paragraph formatting within a cell, see Formatting Text and Formatting Paragraphs respectively.
-
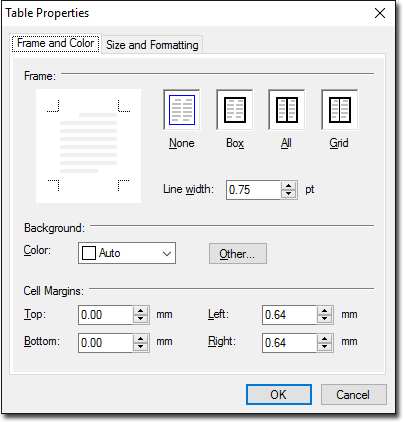
(Optional)To format the table structure, select . The Table Properties window appears.
-
Make adjustments to the format from the following options, as desired;
- Frame: By default ,although you can see the table cells on your letter, they are not printed. This feature adds a printed border to selected cells. To create a printable border, first select enter a Line Width, and then click within the thumbnail preview (the Frame section on the Table Properties window) to apply each border. The example above shows that a 1.5pt line has been applied to the upper and left borders of the cell. Note that you cannot change the border colour.
- Background: By default, each cell has no background colour. To change the background of selected cells, select a colour from the standard 16-colour Windows palette drop-down menu, or click

to select from a 48 colour palette or create your own custom colour. - Vertical Alignment: This is the vertical alignment of the contents of each selected cell.
- Text Distances: This is the spacing between each cell border and its contents.